Board
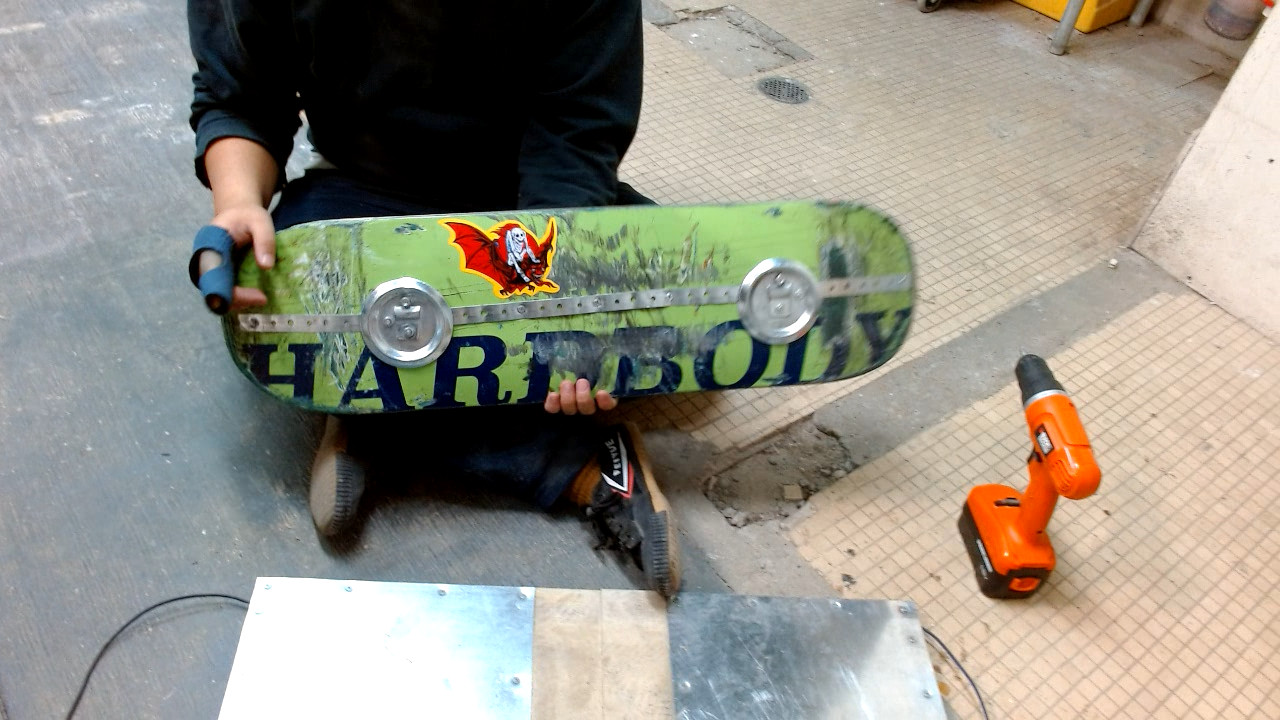
The board is a skateboard deck with two round metal pads drilled into either end of the bottom. The pads are connected by a flat metal strip, creating a conductive contact across the length of the underside of the board. The recommended metal pads to use are actually anchor rings, ordinarily used to hook cargo to a tow cable. They are used because their unique disk shape and slightly raised edges allow for the best motion with the board. The board is subject to a lot of friction and pressure, so it's recommended to follow this manual unless intending to build a heavily modified version of the controller.
Metal strip
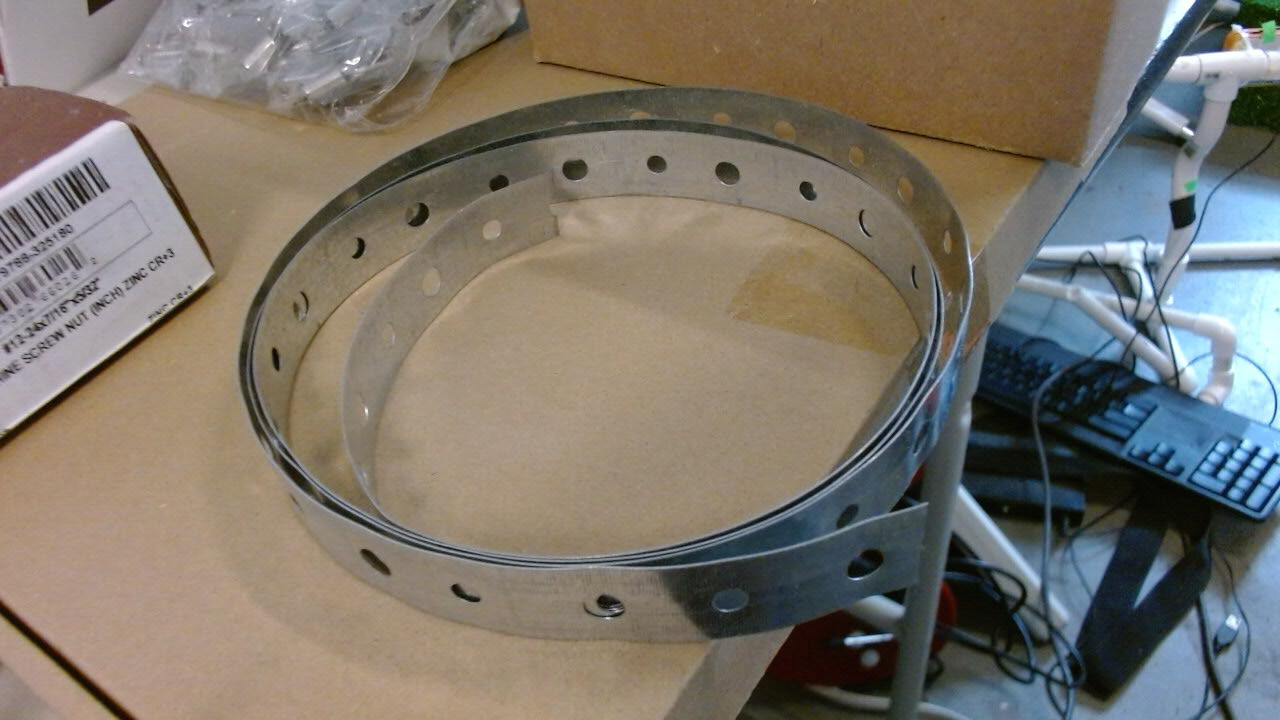
The metal strip is used to connect the metal pads so the signal can be conducted from one to the other. The strip should be attached to the underside, in the middle, running from one metal pad to the other. The metal pads will then be drilled on top of it.
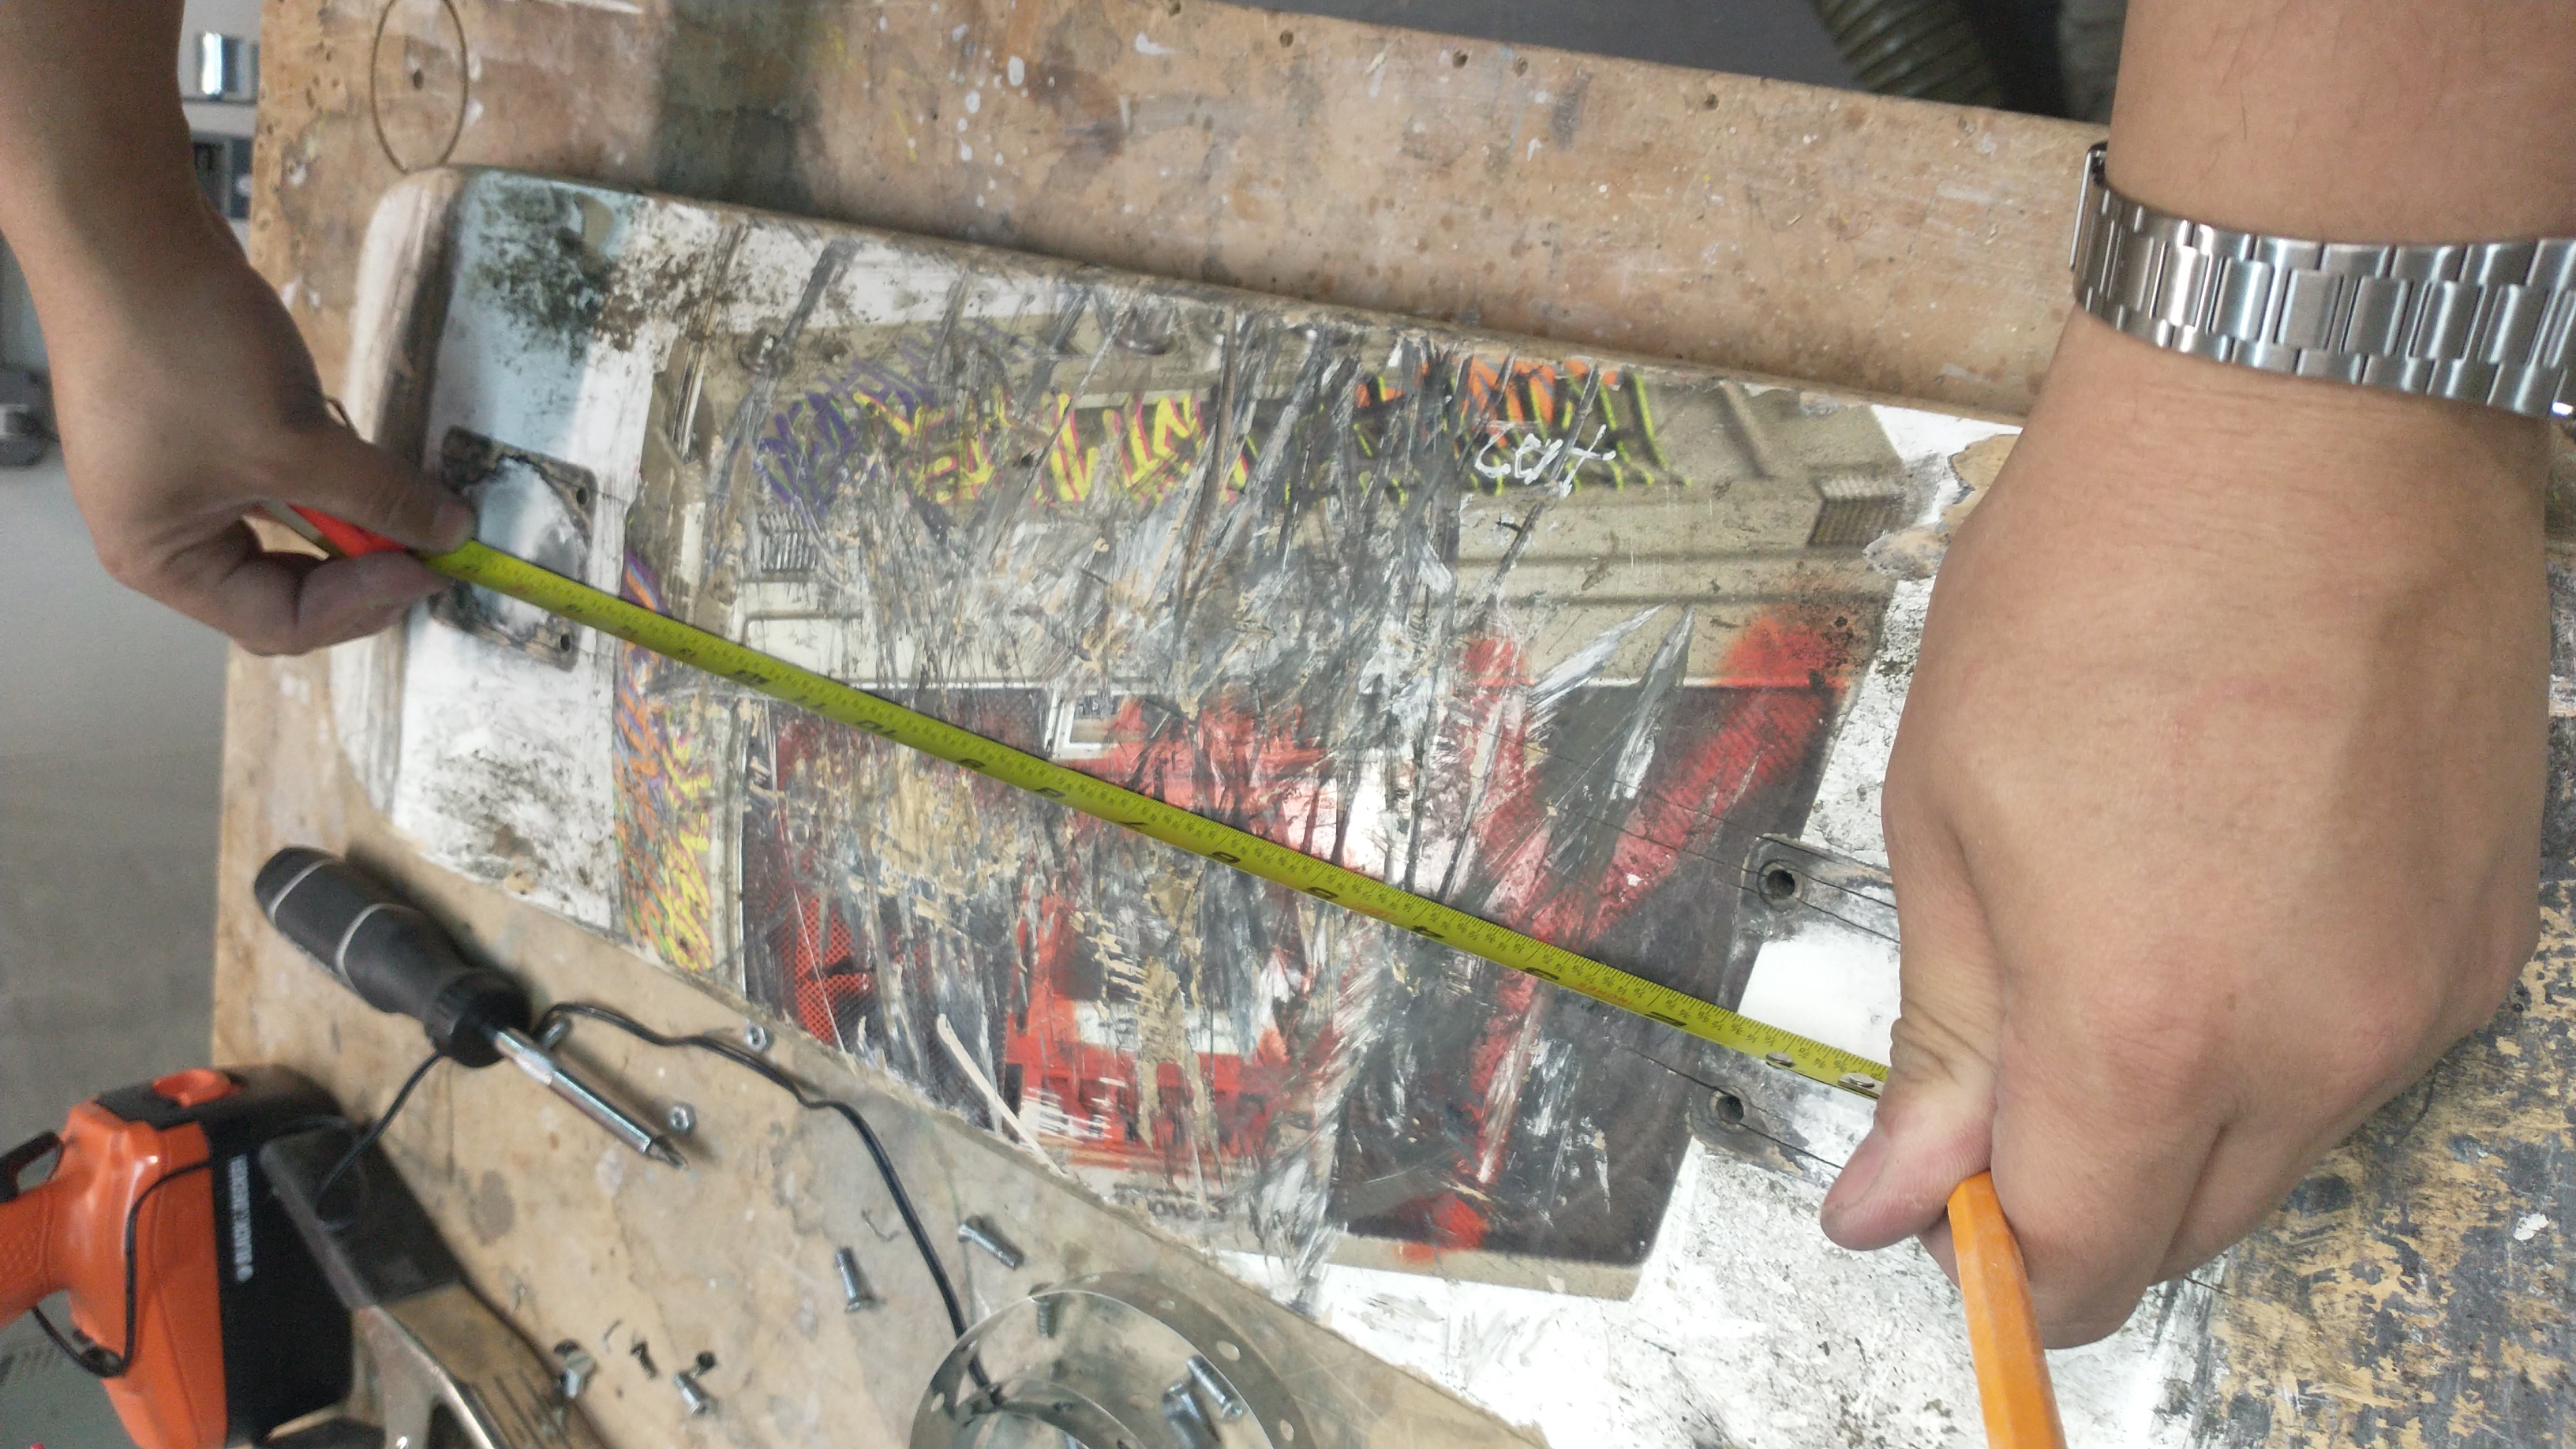
- Measure and mark on the underside of the skatedeck where the center of the metal pads will be. They should each be about
1"in from the center of the truck holes. The centers should be about13"apart. - Measure and cut a length of metal strip so the strip will go from one center to the other.
- Drill the wire strip directly into the underside of the board using the
1/2"sheet metal screws, distributing the screws evenly and covering as much area along the length of the strip as possible.
Metal pads
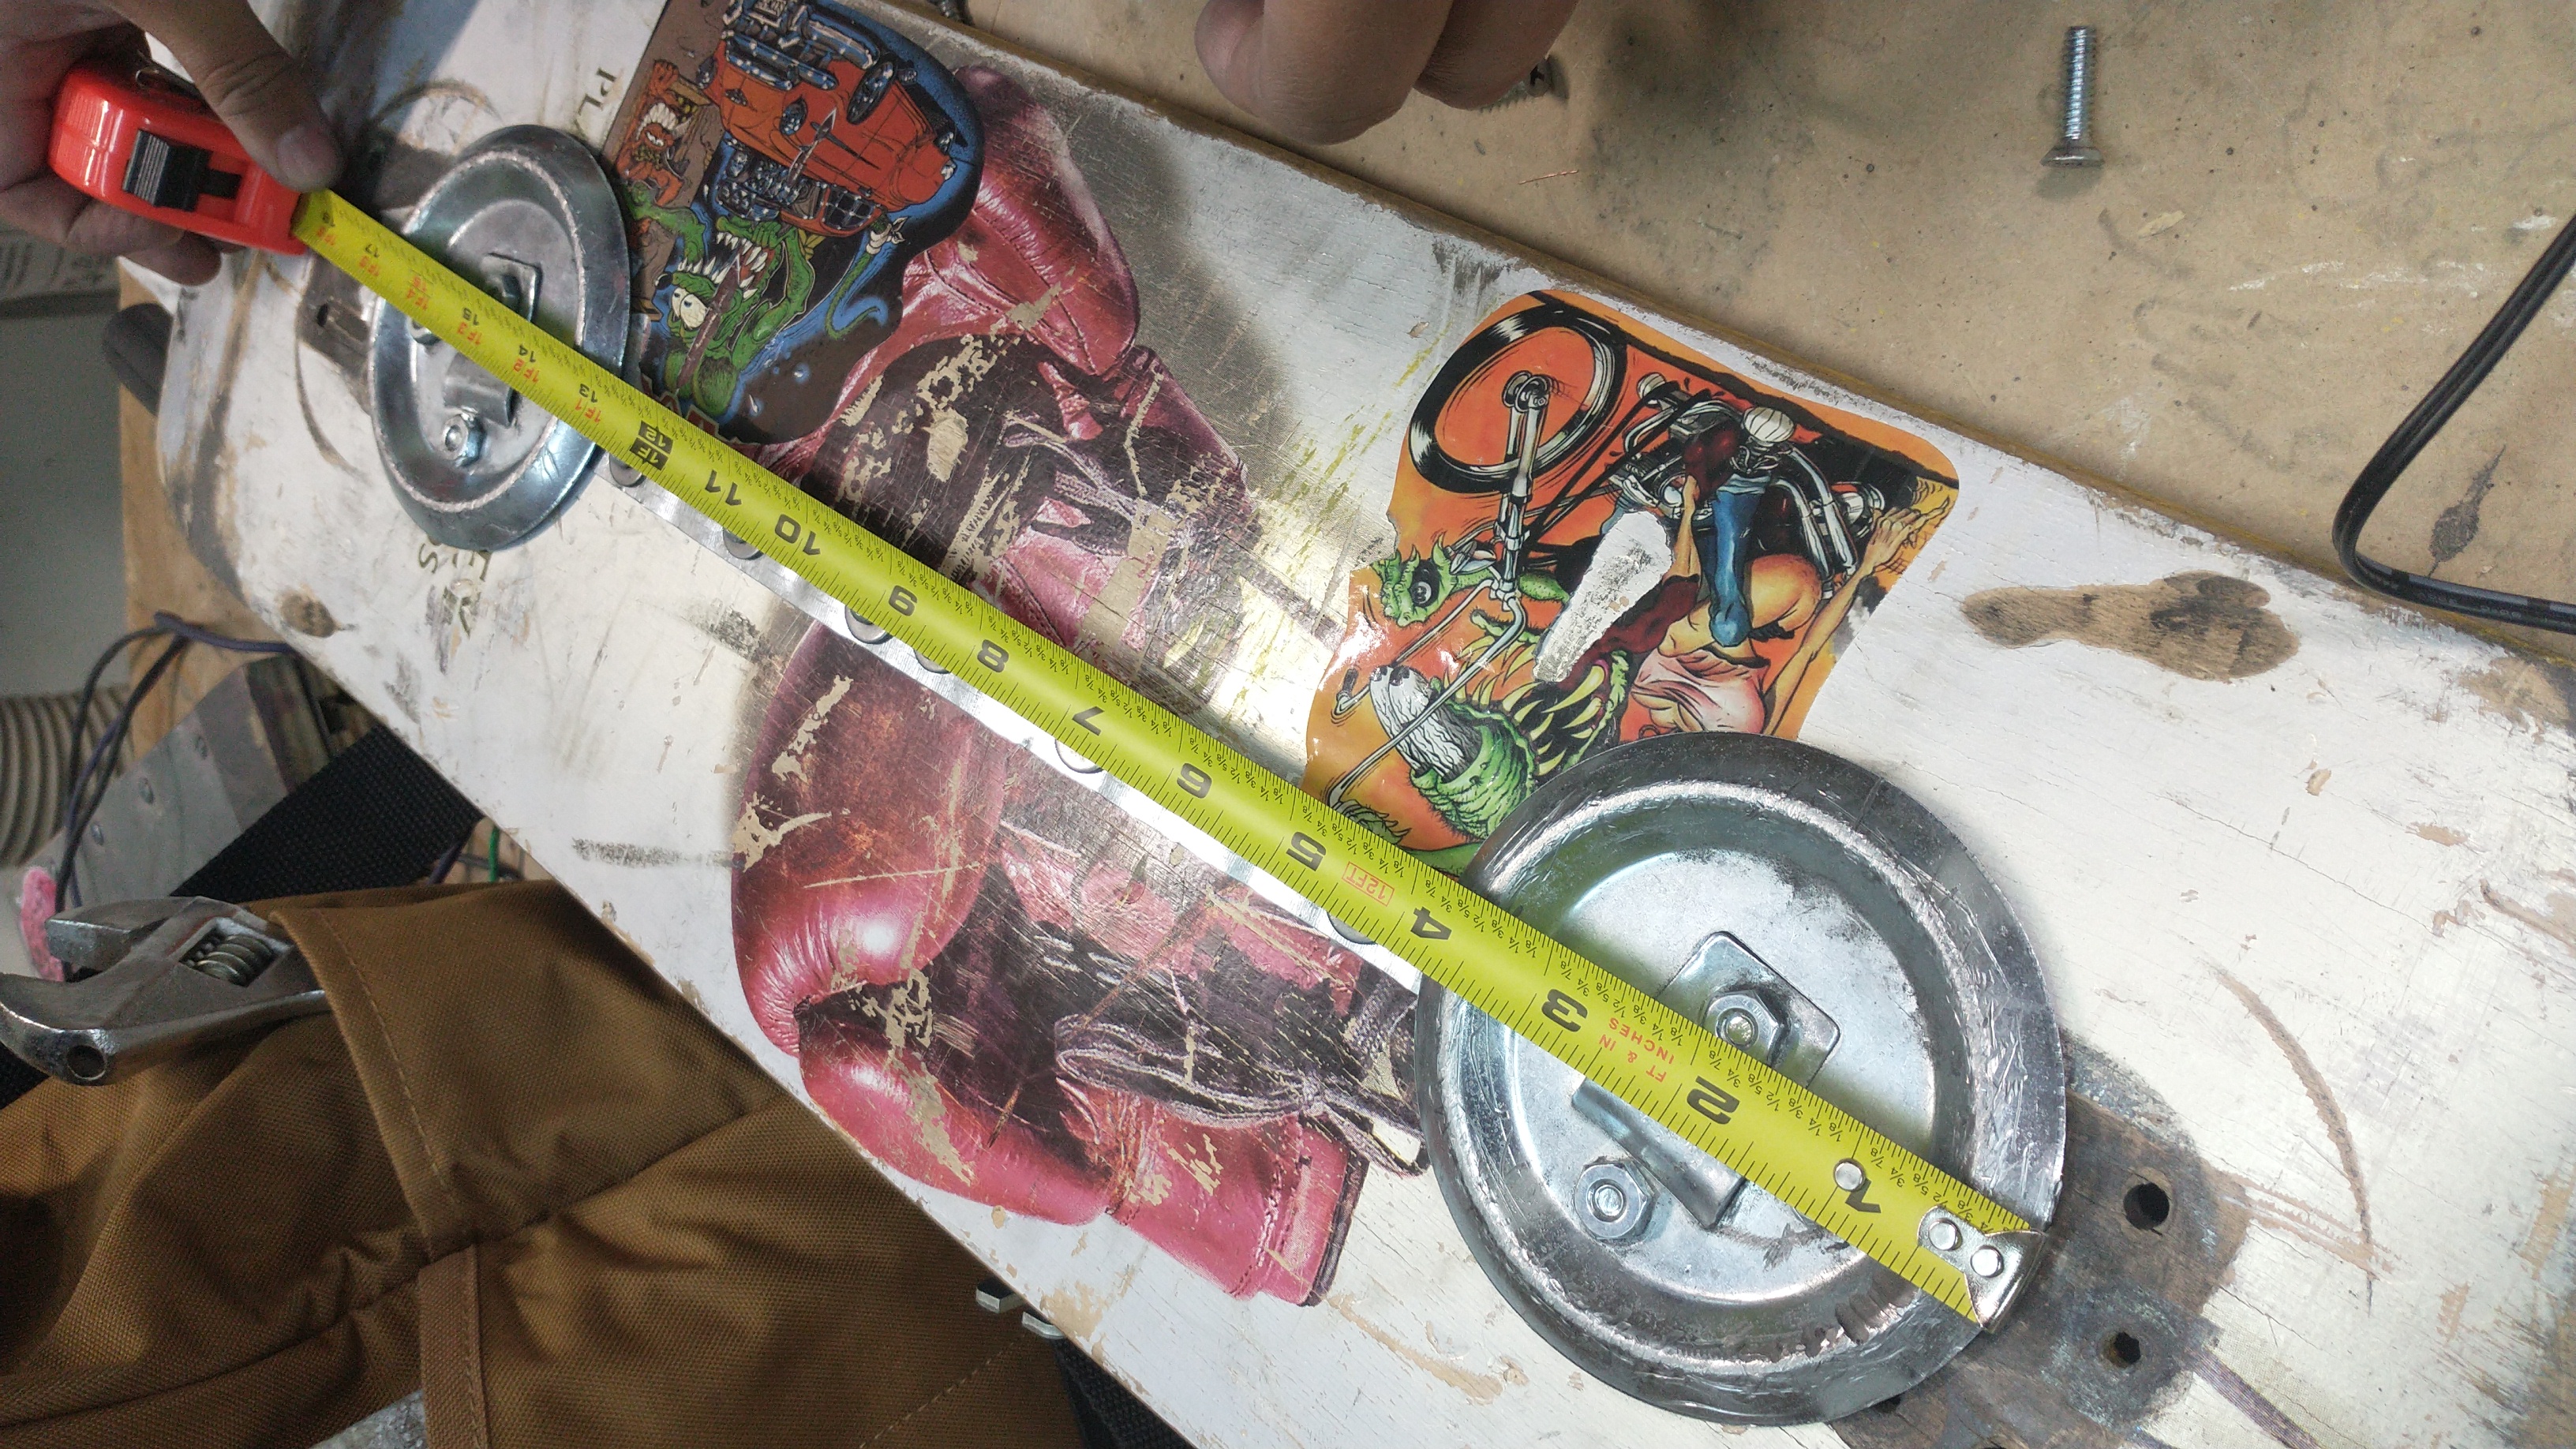
The metal pads are attached on the underside of the skatedeck, slightly closer together than the truck holes, and held in place by machine screws and nuts.
- If the anchor rings have a metal ring in the center, first remove the ring from the base. Pry up the center flap slightly with a screwdriver or other tool, and the ring should slide out.
- Use a hammer on the center flap to flatten the pad as much as possible.
- For each metal pad, place it directly in the center of the underside, with its center about
1"farther toward the center of the board than the truck holes. The center hole of the pad should be directly above the metal strip, ideally lined up with an existing hole in the strip. If the hammering of the center flap caused the hole to move off center, it is fine to leave the hole off center a bit as long as the hole is above wood. - Insert a
1/4"drill bit into the drill. - The center hole of the anchor can be used as a drill point. Drill a hole through the wood so that a
#12-24 5/8"machine screw can fit snugly through. - Use a
1/2"countersink bit or23/64"drill bit to create countersinks for each screw on the top of the board. These will prevent the screw head from sticking out of the board. They will also allow the5/8"machine screws to stick out on the underside just far enough to attach a nut. Each countersink can go through the grip tape and slightly into the wood. - Insert the machine screw from the top of the deck through the underside. Attach a nut to the underside and tighten with a wrench or pliers and screwdriver. If the screw is not sticking out far enough, repeat step 6 with a deeper countersink.
- Two more holes need to be drilled into the metal on either side of the center hole, through the wood, and out the other side of the deck. The holes should be on the opposite sides of the metal strip (not going through the strip). For each hole, spray some WD-40, then drill all the way through both the metal and wood.
- Repeat step 7 for the new holes.
Connect
The board and entire build should now be complete. Try placing the board on two metal pads. The lizard should appear on the screen.
| ⬅ Previous Page | Next Page ➡ |
|---|---|
| Platform | Raspberry Pi |