Operator's Manual
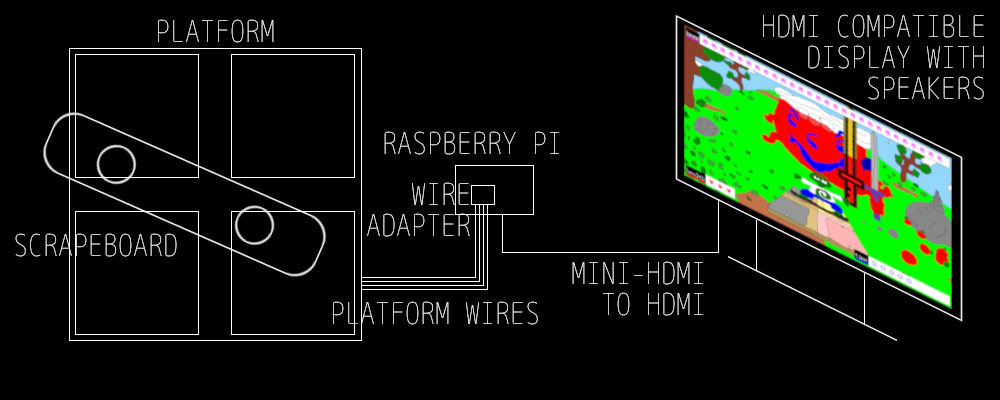
A standard Scrapeboard system consists of the following parts:
| Part | Description |
|---|---|
| Scrapeboard | a wireless skatedeck controller with two metal pads attached to the bottom |
| Platform | 28"x28" fold-able wooden platform with four 12"x12" metal plates |
| Wire adapter | custom PCB for connecting the platform's four wires to a Raspberry Pi or Arduino |
| Raspberry Pi | single-board, embedded computer that communicates with the controller and displays the game |
| Monitor w/ speakers | any HDMI display with speakers, usually an LCD screen, or a projector |
Note: the Raspberry Pi can be replaced by the combination of an Arduino and any computer with Python and Pygame installed. See Electronics (Loading-the-program) and Software.
Setup
- Carefully unfold the platform so it lays flat on the ground, with the metal pads facing up.
- Insert the platform wires into the wire adapter. On the adapter there are labels for which wire belongs in which terminal. FL for front-left, FR for front-right, BR for back-right, and BL for back-left. Use a mini flat-head screwdriver to unscrew each terminal. Insert the exposed copper at the end of each wire into each terminal, making sure the copper is not touching any of the other terminals. Screw the terminal in using the flat-head screwdriver.
- Connect the wire adapter to Raspberry Pi pins 26, 19, 18, and 6, shown in the diagram below. If using an Arduino, connect to pins 2, 3, 4, and 5 instead.
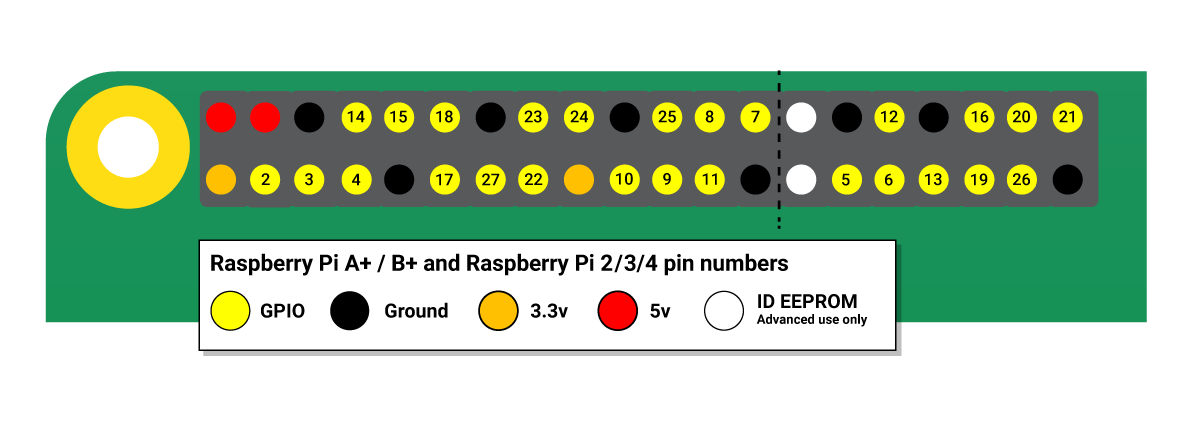 Diagram taken from the official Raspberry Pi documentation
- Connect the Raspberry Pi to the monitor using a mini-HDMI to HDMI cable.
- Plug the monitor and Raspberry Pi into power and turn them on. After a few minutes, the Scrapeboard title screen should appear on the monitor, and the title music and sound effects should start coming from the speakers. (Loading may take up to five minutes!)
- Place the Scrapeboard on the platform, making sure the metal pads on the bottom of the board are touching two metal plates on the platform. The lizard character should appear.
How to play
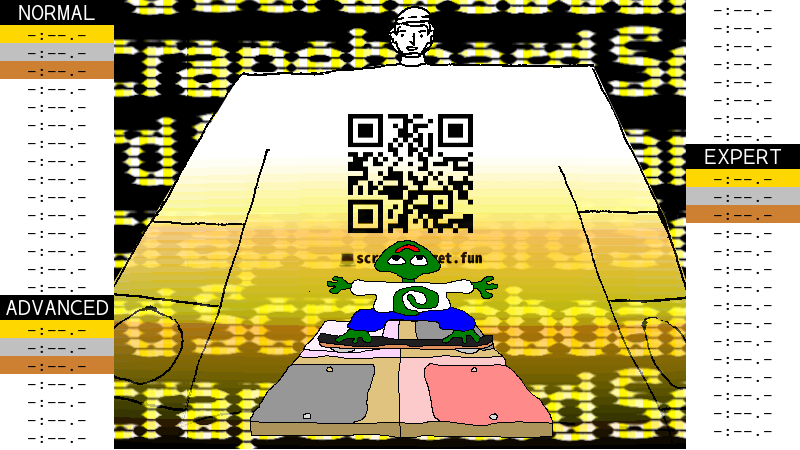
The title screen also serves as a mini-tutorial. Slide the board with your feet until it touches the plates on the platform that correspond with the glowing plates on screen. Do that four times and the level select screen will appear.
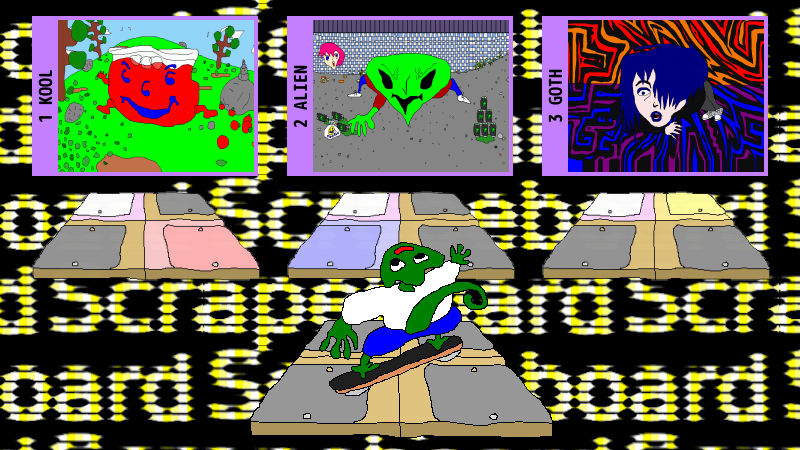
Beginners should start with 1 Kool level.
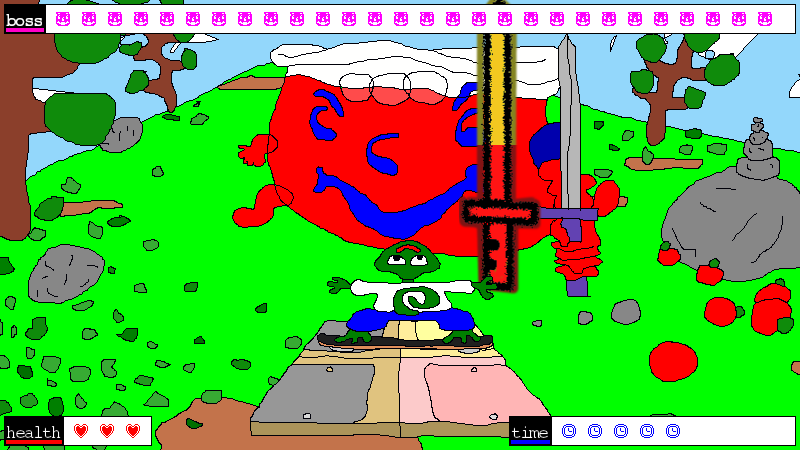
When the boss starts putting swords on screen, start sliding the board onto the glowing pads as quickly as possible. Successfully touch all glowing pads before time runs out, or you will lose a heart. Every successful touch removes life from the boss's HP. If you reduce the boss's HP to zero before you run out of hearts, you beat the level.
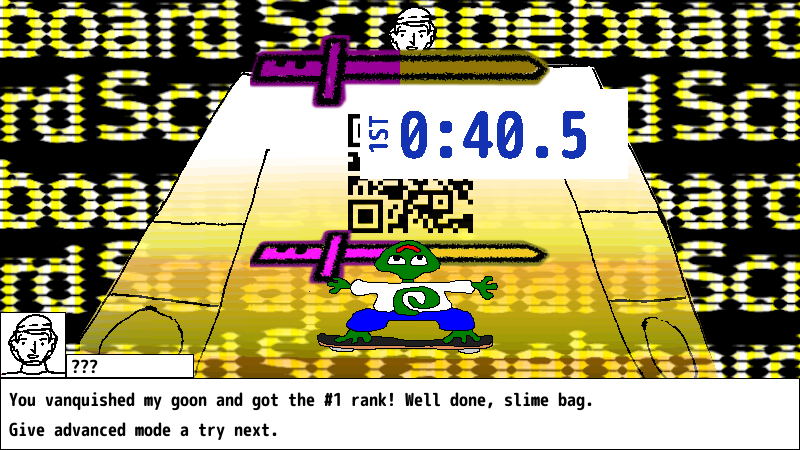
If you beat the level, your time and rank is displayed, and it is stored on the high scores table on the title screen.
Advanced tip
To improve your times, look carefully at the sword swing animation the boss does before the pads start glowing. The entire pattern is revealed in the animation. Do all the moves in the pattern without waiting for each move in the pattern to glow separately. You will be able to complete patterns more quickly after some practice using this technique.
Raspberry Pi
A few advanced operations can be achieved by connecting a USB keyboard to the Raspberry Pi and bringing up the command line. To get started, plug in the keyboard and press SHIFT+q to exit the game to the command line.
Clearing high scores
Use the following command to erase the contents of the scores file in the Scrapeboard repository.
$ cd
$ echo -n > scrapeboard/resource/scores
Update the software
Start by backing up the current Scrapeboard installation in case you end up needing to revert. This will also allow you to restore the high scores after the update erases them.
$ cd
$ cp -r scrapeboard/ scrapeboard-backup
Then go into the scrapeboard repository and pull the latest code with git.
$ cd scrapeboard/
$ git pull origin main
Scrapeboard should now be updated. The high scores are erased by the update, so copy the previous ones from the backup if you want to keep them.
$ cd
$ cp scrapeboard-backup/resource/scores scrapeboard/resource
Use the Raspberry Pi's 1/8" audio jack
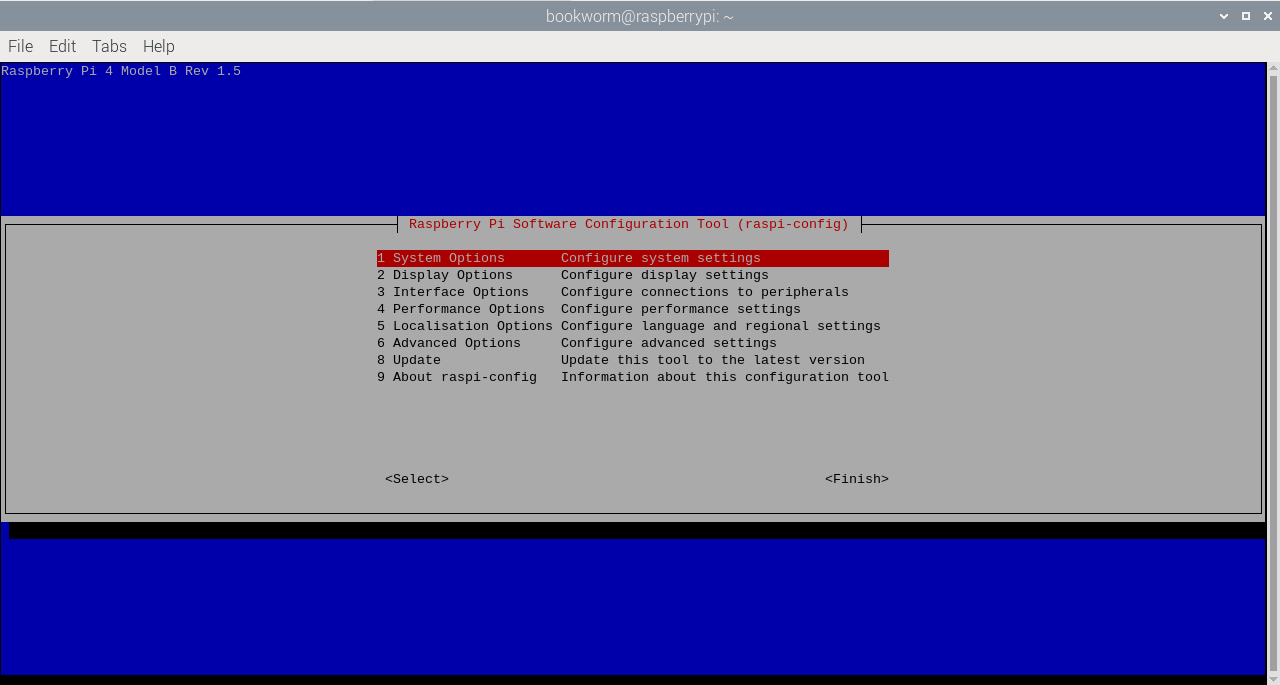 Diagram taken from the official Raspberry Pi documentation
It is possible to get audio from the Raspberry Pi's 1/8" audio jack instead of HDMI. To do this, launch the Raspberry Pi configuration tool.
$ sudo raspi-config
Navigate to 1 System Options > S2 Audio. Choose either Headphones for 1/8" audio or hdmi for the HDMI port.
Fix missing audio
If sound is not working after modifying the Raspberry Pi, reset the contents of the ~/.asoundrc file with the following command.
$ echo -e "defaults.pcm.card 1\ndefaults.pcm.device 0\ndefaults.ctl.card 1" > ~/.asoundrc
Maintenance and repair
Tightening the board
If the metal pads on the underside of the Scrapeboard begin to loosen, tighten them using a pair of pliers and a flat-head screwdriver. Hold the nut in place with the pliers, and tighten the screw using the screwdriver. If you have any thread locker, put that on the screw before tightening.
Feet
The platform feet are relatively untested. If any feet fall out or are making the board uneven on the floor, they can be replaced by screwing a 5/8" screw through the center of them into the wood.
Wires
The routing of the wires on the underside of the platform is relatively untested. If any wires come loose from their position, fix them back in place using a 1/2" screw to crimp them to the wood.
Advanced
For more detailed information on how Scrapeboard is built, how to wire the electronics, and how the software is installed, see the Builder's manual.
| ⬅ Previous Page | Next Page ➡ |
|---|---|
| History | Builder's Manual |